Wednesday, August 31, 2016

Chair Re-hab

 When I want something new I first always go through my stash and see what I already own that I might be able to refurbish.  I decided to turn my sun room (that's connected to my kitchen) back into a dining room because I love looking out the windows while having my morning coffee.  I'm a daydreamer, it's just how I function best, and this is the perfect spot to do it.

 I had 2 of these oak Haywood Wakefield fiddle back chairs, and 2 French styled arm chairs (that were probably from an office because they were very sturdy, gloss varnish and vinyl upholstered seats, not pretty but good bones!
Since these are Haywood-Wakefield chairs I really didn't want
to paint them.  I just re-upholstered the seats with traditional pillow
ticking fabric.

I had intended to recover the backs, but they used tiny, long
staples in a small groove and there must have been a million of them!
If I could have gotten to them I would have most likely ruined the chair,
so I ended up priming and painting the fabric cream.  It's not a soft feel,
so I would never put it on a seat but the back of the chair is fine.

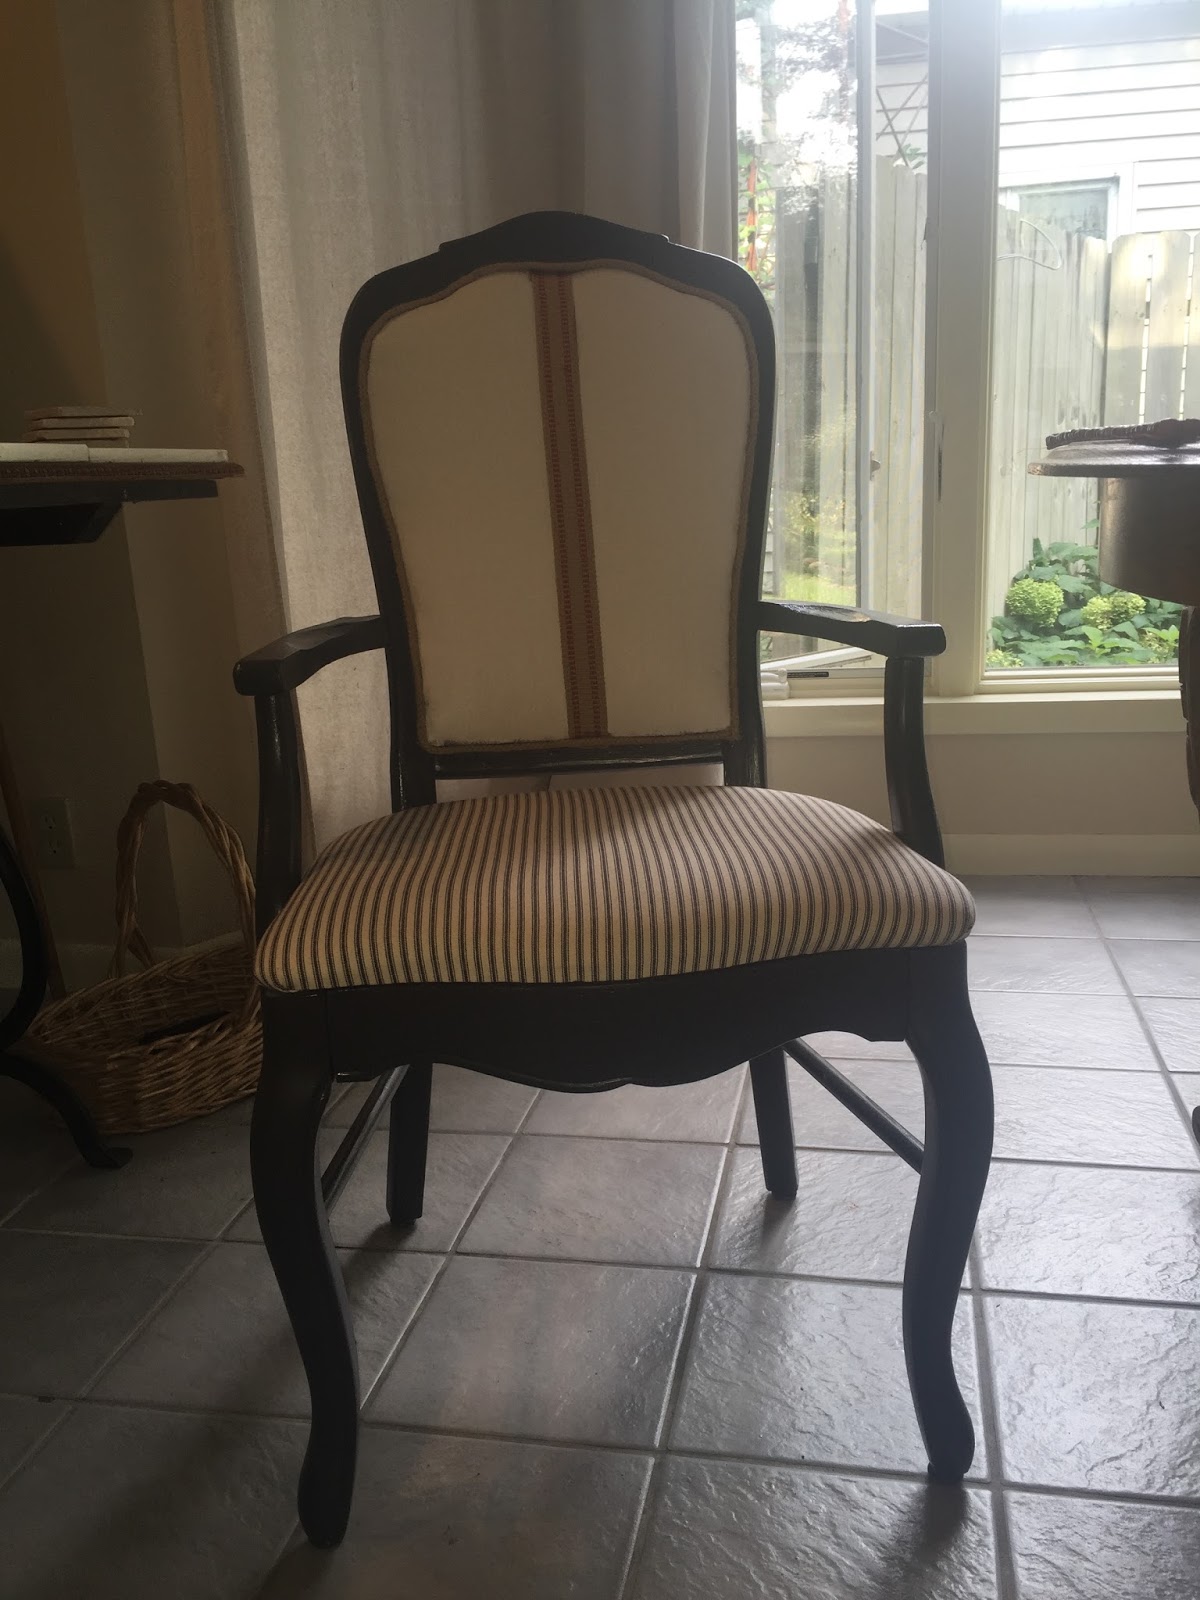
I used(left over from the cabinets) oil base paint for the chair.  I'm so over chalk paint.  I tried to
paint over another set of chairs that I painted and finished with wax and the paint will not stick.
They will all have to be stripped.
To replace the cording and add a little embellishment I went with a natural burlap webbing strip,
I used a fabric glue and stapled the ends.  Then added the cording also in a natural jute. 

They also pair well with my drop cloth draperies.

Close up of the details.
 I like to keep my dining room pretty neutral because I have a large collection of vintage dinnerware and depending on my mood or the season, it changes frequently.   This little bit of trim adds a nice rustic finish to a formal chair.  I have red accents (my small appliances and wool rugs) so the trim ties everything together.
The backs are also finished off with the trim.
I bought a vintage round oak table with carved cabriole legs, and fully intended on painting it but once I put everything together I like the warmth of the old wood and left it for now.


Thursday, August 25, 2016

The Reveal

Last November I started to paint the kitchen, starting with the ceiling and came to a crack that needed to be repaired.  I have neck problems so it was something we needed to call in a professional for.  I also needed to take down the old fan to finish painting and told Ed that I found a really cool fan that would look great in our dining area.  He told me I could get it.  The more I thought about spending all that money on a fan when I really needed a new cooktop.  Mine was probably from the 70's, electric and took 15 minutes to heat up.  So everything came to a halt and we got to work on the design.  With all the doors and windows we couldn't change to much about the layout except to widen the work area, and change the stove to the back looking out into the dining area.  We also shortened the area where the faux island is to make a larger walk way.  Instead of cabinets for the pan we added drawers.  I feel like the few changes we made have made cooking so much easier!  and quicker!

Since our home is a period home (1910 Craftsman style bungalo) I wanted to stay with cabinetry that reflected that period but modernize it with paint.  I also used period iron hardware (reproductions).  I like the steampunk look of adding some industrial elements to an period house and have added clear glass school house light fixtures and an up cycled egg basket pendant light with an Edison bulb above the island.  I stripped the door and tried to stain it to match the floor but it just didn't look as good as I hoped it would so I ended up painting it.  I also used a vintage register vent that you see in this photo.
Having changed from tile to quartz made cleaning so much easier as well, no grooves.  If you missed the before photo's they are in the previous post.

Going up the steps from the kitchen dining area


looking back at the dining/sunroom area.  This is the same
tile that used to be onto of the flooring in the kitchen.  We kept it
for now.  The draperies are made from canvas drop cloths, and hung on
copper pipe..


My new farmhouse sink, and a few old plates that belonged to my great, great grandmother.


New light fixtures

The Faux island

Pots and pans drawers-Its so wonderful to not have to
dig through stacks of pans.

Bosch cooktop with retractable vent.  Now you see it

now you don't!

The cabinets were custom made with maple and finished
with an oil based paint.  I know that's not as environmentally
friendly but the durability of oil far exceeds the latex or acrylic.

Quartz and Hickory counter tops

The view over the stovetop (subway tile with charcoal grout)

The Fan that started this whole renovation!  The whole fixture
spins around and really keeps the kitchen cool.

Wednesday, August 24, 2016

Kitchen Renovation Before


I take so many photo's but realized that there are very few of the room that I probably spend the majority of my time in.  So after quite a bit of digging I found a few of the before pictures.   As you can see by the amount of stuff of the counters that might be the very reason why-I'm usually using it and don't want that stuff in the picture!

 We removed an eating bar and chairs that were located on the other
side of the stove top and bumped out the cabinets to that width making our work area
a much better size for two people working in the kitchen.  We also cut the cabinets about 6"
short on that end allowing for more room when the refrigerator doors are open.  I really wanted
an island but couldn't afford the space so I created the end cabinet to look like one.  It has a
hickory wood top, and is outfitted with a large utensil drawer, and 2 pots and pans drawers.


We removed this light soffit to open up 
our view.  (These are old pictures!)

The lighting is bad in this photo, but it shows the
placement of the old electric stovetop above
(see the tea kettle)

On the built in on the outskirts and the top cabinets we
only needed to replace the doors.

This is the area that we now have our GAS
cooktop-with a view!

The area where the stove is, is now the island

stripping down the old tile

Ripping down the soffit and we removed tile that had been laid
right on the top of the original wood floor.


everything out!

The floor before

The same floor after sanding and repairs

With the finish


Stay tuned for the After photos!


Thursday, August 11, 2016

Musakka -A Favorite Summer Dish


My summertime favorite vegetable is eggplant and tomatoes (together) and right now my garden is rocking both of these.  Our very favorite is grilled eggplant layered with sliced tomatoes and buffalo mozzarella cheese, baked until the cheese melts and sprinkled with fresh basil.  If you think you don't like eggplant try this-it's a game changer.  

My friend Lisa shared her mom's recipe for Musakka and it has become a summer staple.  I had 6 nice sized eggplants so I made 2 pans for the freezer and one small one for dinner tonight.  I've made a few amendments to the recipe with wine and spices.

Start with 2 large eggplant chopped into bite sized pieces, sauté in olive oil until lightly browned and soft.  Pour into your greased baking dish.

Saute' 2 vadalia onions until slightly camelized and and add on top of the eggplant.

Next add garbanzo beans (I always buy a bag and soak and cook my own but you can buy canned).  One can should do it, I used one small bag of cooked beans for 2 small pans and 1 large just to use them up.  Make some hummus if you have left overs!

Spread the top with sliced tomatoes or cherry tomatoes.  I actually chopped mine and added lots to make some good liquid.  The recipe calls for 3/4 Cup of water, but I use wine for extra flavor (a dry chardonnay-It will be a nice pairing for the dinner!)  I also crushed some dried oregano (my homegrown) and will add fresh basil when it comes out of the oven.  Also salt and pepper.  Bake at 400 degrees for 1 hour.

The other two pans were ready for the freezer as soon as I was finished making them. (I didn't bake them for an hour).  Everything that needed to be cooked was.  I'll get them out in the morning (this fall when I leave for work) and they will be ready to stick in the oven when I get home.  

I'm not a vegetarian because once in a great while I want a good organic steak or burger, but for the most part we are.  This is loaded with protein and is a great main dish if you are a veg head or side dish if you aren't.


If you are an eggplant lover, what are some of your favorite ways to fix it?  I'm always up for a new dish.